You create a Site Visit when you do work for a customer. If you send a technician out to a site to do an estimate or perform a service, you should document their work on a Site Visit. The Site Visit tab contains all information pertaining to the actual Site Visit.
Buttons on the Site Visit Form
| New – | Creates a New Site Visit for that location |
| Multi – | Creates multiple Site Visits for that location |
| Delete – | Deletes the highlighted Site Visit (Be careful not to hit the Delete with the X or you will delete the entire Service Call. |
| Page – | Sends a Page to a particular technician with the Service Call information. See Sending Text with Service Call Information. |
| Undo – | Undoes the last thing done (i.e. entering Actual Hours), except in the Internal Note field and the Assigned Technician field. |
| Save – | Saves the Site Visit. |
To Create a Site Visit:
1. Open a Service Call or create a New Service Call.
2. Once the Service Call is saved, click on the Site Visits tab.
3. The Site Visits tab is now open.
![Service Call: 103101 [[ABC002] ABC Building #2 - Site Visits tab Service Call: 103101 [[ABC002] ABC Building #2 - Site Visits tab](https://help.jobcost.com/wp-content/uploads/2016/07/Service-Call-103101-ABC-Building-2-Site-Visits-tab-Technicians-field.png)
4. Click the New button next to the Multi button on the Site Visits tab to create a New Site Visit (not the New icon next to Close. That creates a New Service Call). See Creating A Site Visit.
5. Notice that MRM automatically changes the Status to Scheduled, enters the Time Sched Date as today’s date and the start time (defaults to 8 am, with 1 Estimated Hour.)
HINT: We can change the default time to whatever time you request, such as 7:00 am. The same goes for Estimated Hours.
![Service Call: 103101 [[ABC002] ABC Building #2] - Site Visits tab - New Site Visit Service Call: 103101 [[ABC002] ABC Building #2] - Site Visits tab - New Site Visit](https://help.jobcost.com/wp-content/uploads/2016/07/Service-Call-103101-ABC-Building-2-Site-Visits-tab-Status-field.png)
6. Click Add located in the middle right of the form to Add a Technician.
7. Check the checkbox by the “Technician(s)” that will be doing work on this call. Work Performed contains information pertaining to what the Technician did on site. This field is specific to the on Site Visit that it is entered on, which is useful to giving detailed descriptions. Internal Note is a text field that is stamped on all Site Visits. This means that whatever Site Visit you are on, you will be able to see whatever was typed in the Internal Note.
8. Once you’ve entered all pertinent information, click Save next to the “Internal Note” label on the form.
9. Click Save in the toolbar on the Service Call form.
10. Click Close.
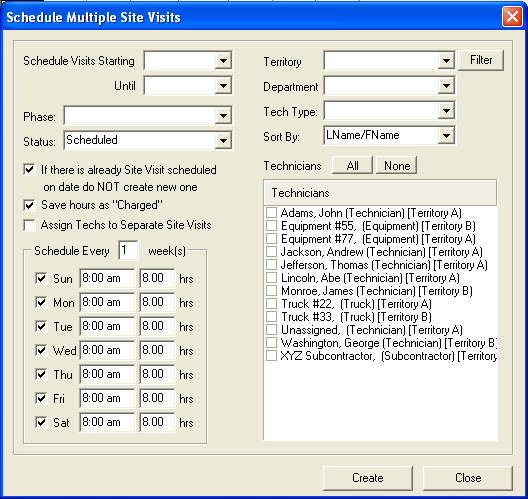
Multi-button on the Site Visits form: The Multi button on the Site Visit allows you to enter Site Visits for a specific location for multiple days at a time. This feature comes in handy when needing to create recurring visits for the Service Call.

To Enter Multiple Site Visits for the same Customer/Location:
1. On the Multiple Site Visits form, enter the starting and ending scheduled dates
2. It is optional to keep the checkbox beside “If there is already Site Visits scheduled on date do NOT create new one” but is highly recommended.
3. You have the option to check “Save hours as ‘Charged'”
4. You can schedule multiple days up to multiple weeks at a time
5. Uncheck the days that you do not want Site Visits
6. Edit the starting time and how many hours they will be on site to the appropriate information.
7. Check the boxes beside the “Technicians” that will be on site.
8. Click Create.
9. MRM will calculate how many Site Visits were created. You can view and edit these Site Visits via the Dispatch Board.
TIP: When scheduling multiple Site Visits, by default the technicians will be the same for each Site Visit. In order to add or delete Technicians for Site Visits, you must open that particular Site Visit and click Add or Delete by the Technicians field.
Changing the Site Visit Time increment:
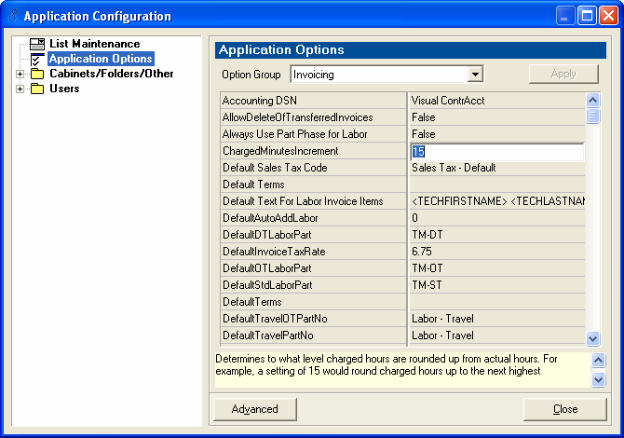
Mobile Resource Manager allows you to change the Standard Hours field to show different amount increments that the customer will be charged. You can also change how many minutes you can minimally charge. For example, say you had a Site Visit that only took 15 minutes. You can set this field to show half an hour minimum charge or it can show the actual time or 15 minutes.
To Change the Standard Hours field:
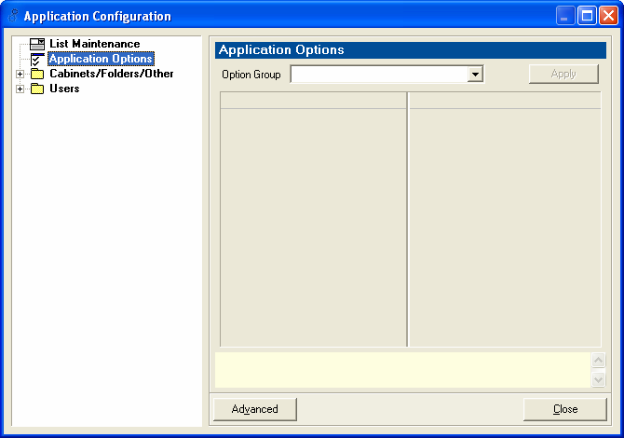
1. Click File > Administration > Application Configuration > Application Options.

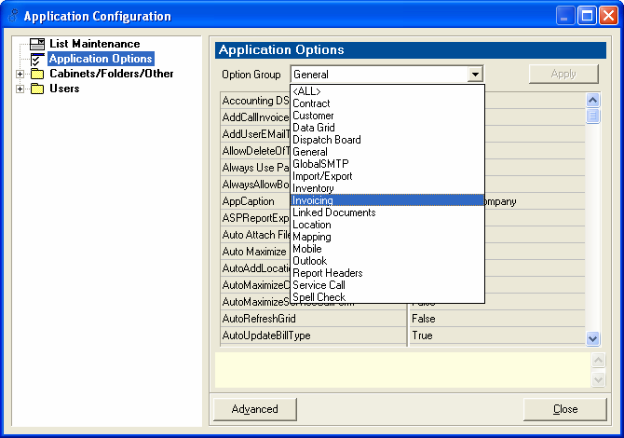
2. Click the drop down arrow by the Option Group field and select “Invoicing.”

3. Change the “ChargedMinutesIncrement” field to suit your needs.

4. Close out and you’re finished.