Mobile Resource Manager allows you to import files, such as Customers, Locations, and Invoices. You can also export files from accounting software such as Inventory and Parts. In the steps below, we will import customers from a .csv formatted document, such as an Excel Spreadsheet. Before you run the import, you must define the import.
To reach Application Configuration:
1. Click File
2. Click Administration
3. Click Application Configuration
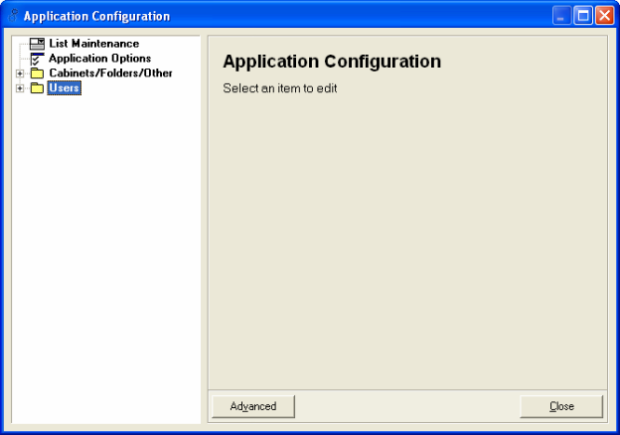
To Define the Import:
1. Click the Advanced button.
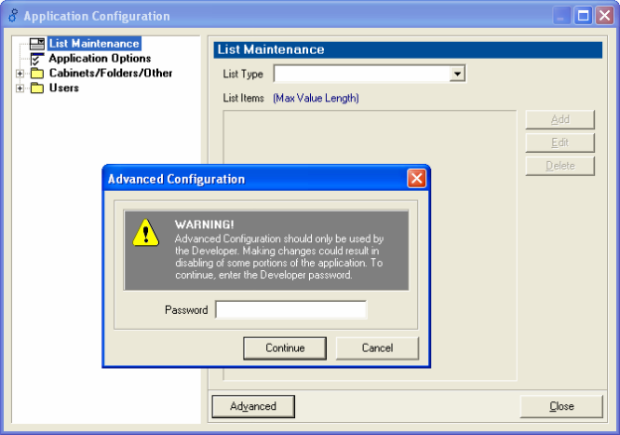
2. Enter in the password that is provided by our support team.
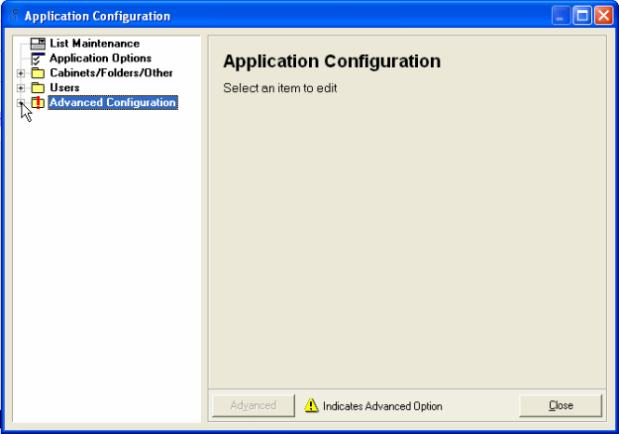
3. Click on the + by Advanced Configuration.
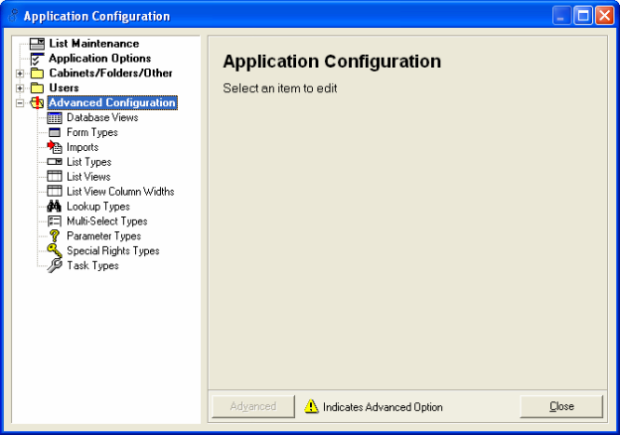
4. Click Imports and select the file you are importing, such as ‘Customer’, then click Edit.
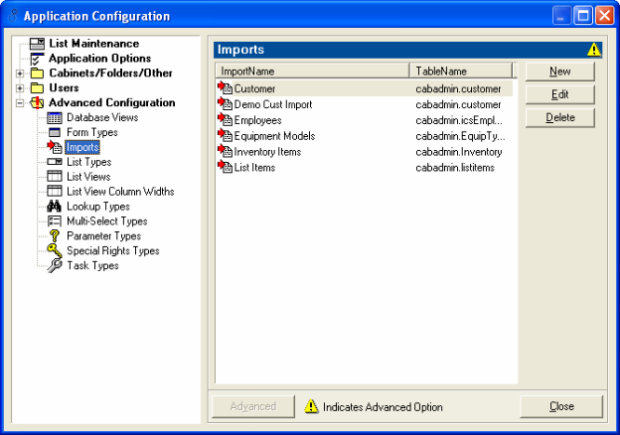
5. The Import Specification Dialog box will appear.
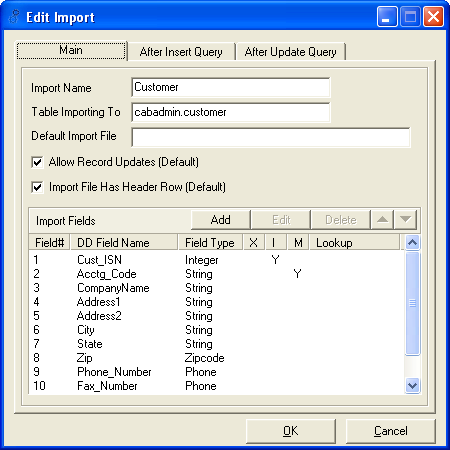
When importing from a csv formatted document, the column data in the spreadsheet must match the data that is supposed to go into the MRM Field Names. For example, if you have “Customer Name” column in the spreadsheet, it must be in the second column of the spreadsheet because it is the second item in the Import. (Use the above picture for visual help).
1. The “Import Name” will be the name of the file you are importing, such as Customer
2. In the “Table Importing to” field, enter in the name of the MRM table that the text file will be imported into
3. In the “Default Import File” field, enter in the default name/path of the text file (if any). If this is not entered, the user will need to select a file from a browse dialog box.
4. You can add/edit/delete fields from the specification using the related buttons.
5. Use the up/down arrow buttons to edit the order that the fields appear in so that they match the import text file. This is extremely important that the order here matches the order in the spreadsheet. If it doesn’t, the data will be imported in the wrong fields.
6. Check the “Allow Record Updates” checkbox if you want to update existing data in MRM. At least one field will need to be marked as a “Match” field. For a field like Customers, make sure that the Cust_ID field in the import file matches the Acctg_Code in the Import Specifications. MRM looks at this field to verify that this customer already exists in MRM.
7. Check the “Import File Has Header Row” checkbox if the first row in the text file includes field names. This will make sure that the import process excludes this row when importing.
8. Click OK.
To edit an existing Import Specification:
1. Double click the name in the list, such as Customer, or highlight it and click Edit.

2. The “Field Definition” dialog box will appear.

3. The value of “MRM Field Name” should be set to the name of the field in the MRM table you are importing to, such as Customer or Customer Name. If the specific field in text file is not being imported, you should still insert a column with a heading in case you will be using the field in an “After Insert” or “After Update” query.
4. Set “Field Type” to the type of field. Choices are:
Boolean: Values of 1 or a string beginning ‘Y’ or ‘T’ will be considered True or anything else (including blank) will be considered False.
| Date | |
| Float | |
| Integer | |
| Phone: | MRM stores phone numbers as numbers only. For Fields set as “Phone” type, any dashes, parenthesis, etc… in the Text file will be stripped out on import. |
| SSN: | Similar to phone numbers, MRM stores numbers only. Dashes in import text file will be stripped out. |
| String | |
| ZipCode: | As with Phone/SSN, non-numbers will be stripped out. |
5. “Lookup Value” can be used to translate the value from the text file to a related value in MRM. For example, MRM uses the value Cust_ISN as a unique numeric value. However, a value in the text file may be a customer id from another system. The import can use the Cust_ISN value from the customer table where the MRM icscustomers.acct_code value equals the value from the import file.
6. Check the “Do NOT import” checkbox if the related field in the import file will not be imported to the named MRM table. For example, if your import file for Customers contain Location information, you do not want to include Location information in the Customer table as Locations have their own table. Also, if there are location headings in the import file, make sure that they do not copy headings for customer fields. For example, Customers could have Address1 and Address2 to import address lines. Locations can contain the same fields. Rename location headings to LAddress1 and LAddress2 to avoid errors.
7. Check the “Auto ISN” check box if the MRM field is an Identity (auto-incrementing) field. If the import file does not contain this field, insert a column specifically for this field. If this field is left blank, the value will be generated automatically. You could also number it yourself; 1, 2, 3, etc.
8. Check “Match field” if the field value will be used to determine if a related record already exists in MRM. For example, when importing customers from an accounting system, the import would check if the value in the import file had a match in the CustID field of the MRM customer table.
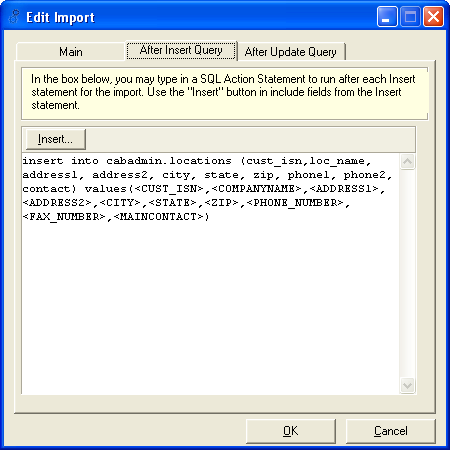
When a Customer is created, MRM automatically creates a related Location. More details on this can be found here.
If you have other fields in the file that you wish to import into another table, such as location information, you can run a query in the “After Insert Query” text box.
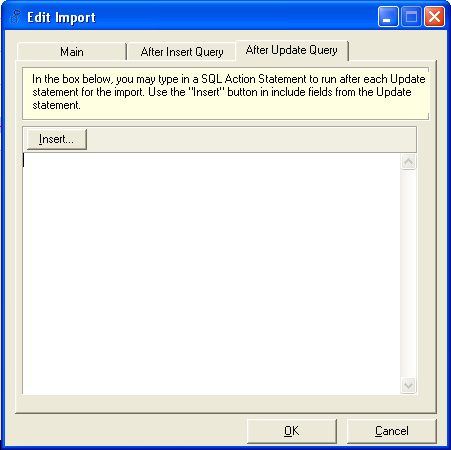
The Insert button can be used to insert field place holders from the related import file record.
The above query states that the named fields from the Import Specifications should be inserted in the Locations table as named above.
You’re now ready to run the import.
To Run the Import:
1. Click File
2. Click Administration
3. Click Import
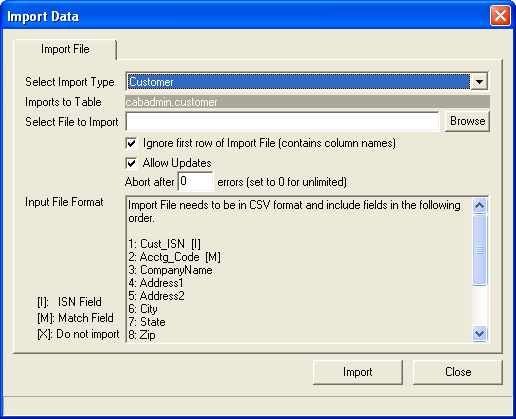
4. From the “Select Import Type” drop down list, select the type of import you are doing, such as Customers.
5. Make sure the “Input File Format” order of the fields are the same order as in the import file.
6. Click the Browse button to select the file to import.
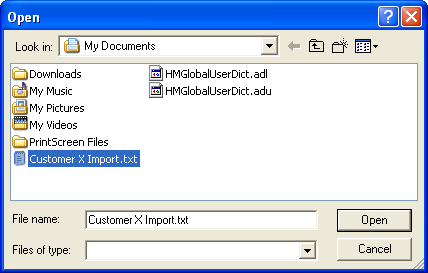
7. If the import file has column headings, make sure the “Ignore first row of Import File” is checked. This excludes the first row in the import file, which contains the column headings.
8. If you are updating this record, check the “Allow Updates” checkbox
9. Zero defaults as the number of errors that you’ll see before it aborts the import. Keep this number at zero so you can see all errors, if any.
10. Click Import
![]()
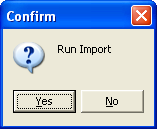
11. Click Yes on the Run Import prompt.
12. In the bottom left corner of the Import box, you will see how many records are being imported into MRM. If there are any errors, MRM will list them for you.
Please contact Support if you have any questions.